Click anywhere to close
Lately I’ve been learning to play guitar. I wanted to be able to try out a bunch of different pickups on my guitar, to get a feel for what sound I prefer. However, the only guitars on the market with hot swappable pickups are made by Relish Guitars and their cheapest guitar is $4800, a bit outside of my price range. I decided to build my own, because "how hard could it be™"
Before jumping into any design I like to throw together some requirements. In order to stop this project from growing too much, I gave my self the following limitations & requirements:
The relish guitar system uses 4 magnets to attach the pickups to the guitar body. It’s hard to find good images of this online, but the best I can tell they avoid any magnetic interference by keeping the magnets pretty far from the pickup. I believe I will be able to use a similar magnetic system in my designs.
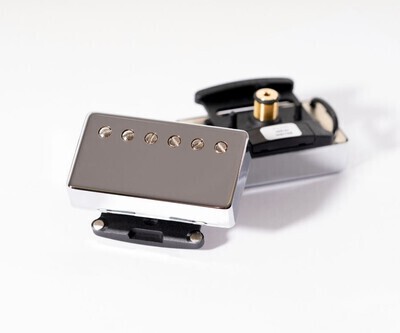
The wonderful site GuitarFetish makes a solderless pickup connect system). This will be the simplest way to plug the pickups into my guitar electronics. I’d like to avoid making my own connection system on top of everything else.
On every electric guitar, the pickups have dampening springs. From trolling online guitar forums, it sounds like these are pretty important for dampening some vibrations from affecting the pickup. In my design, I will be sure incorporate similar springs.
Like with most projects, I tried to start at the most unsure / hardest part of the design first, and did my best to validate it fully before moving on. The most novel part of this project is definitely the removable pickups, so I started there.
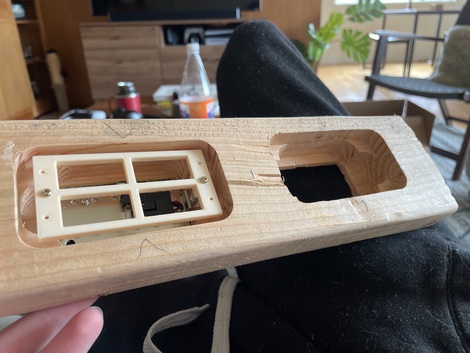
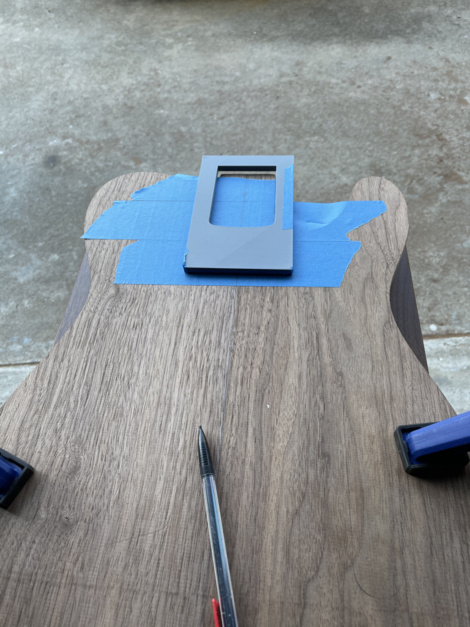
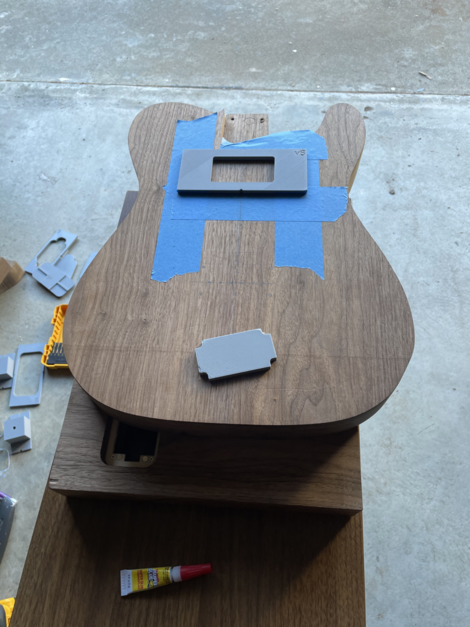
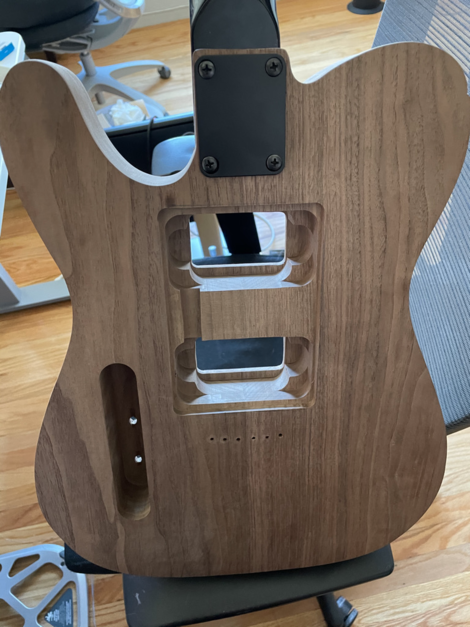
The system I designed consists of 3 different precisely cut holes in the wood, and two 3D printed pieces (one that attaches to the pickup, and one to the guitar). The holes were designed to be cut with a handheld trim router (that’s all I have).
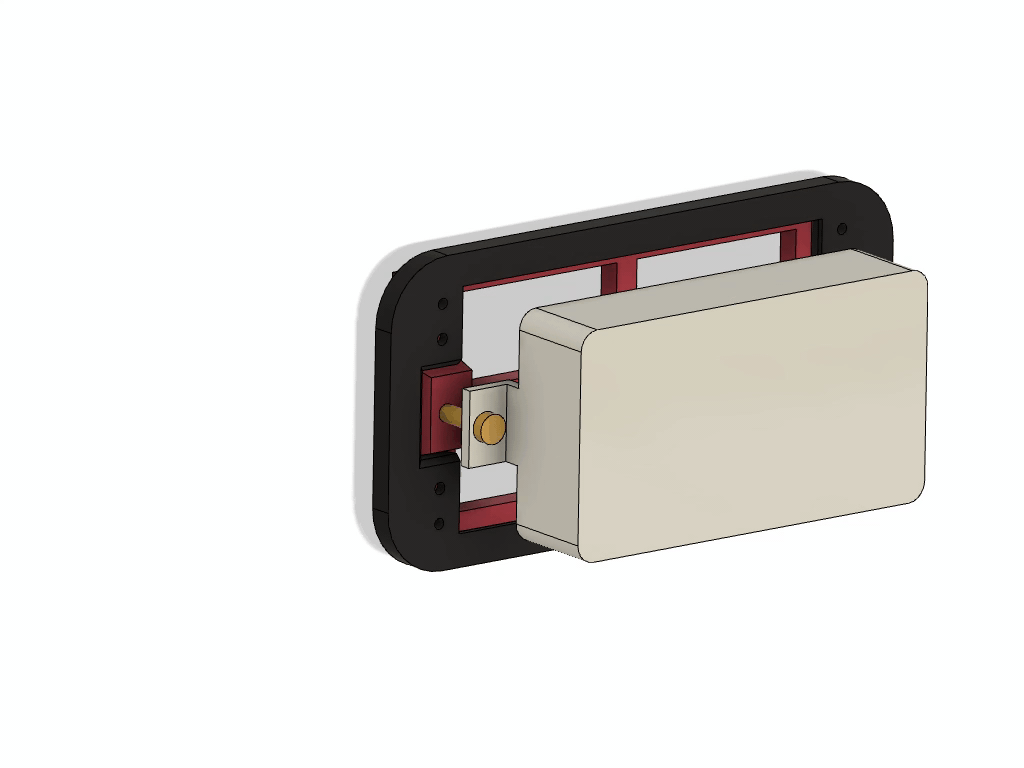
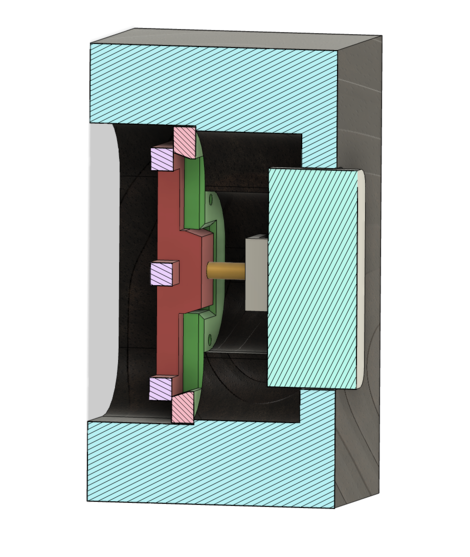
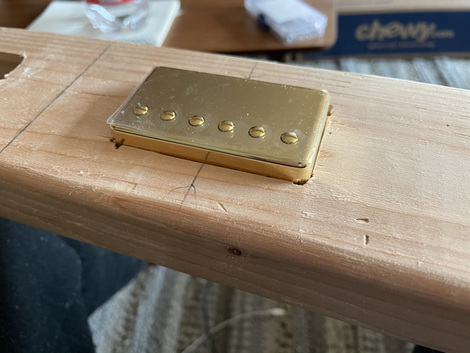
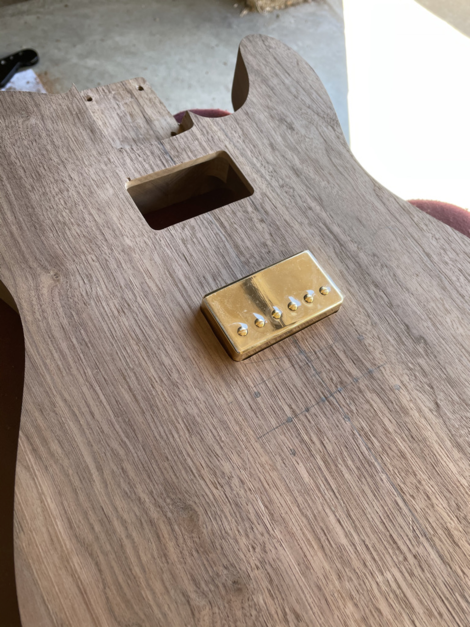
Here you can see the pickup and 3d printed parts. I chose to 3d print the guitar-side attachment as well to reduce the coupling in the design. This way if I need to re-design the attachment method, I can easily 3d print a new part, and not have to cut into the wood. In the animation, the black piece is attached to the guitar, and the red piece is attached to the pickup. The two pieces are held together by magnets when the pickup is inserted.
The wood side of the project is 3 different depths of cut. The front most cut (smallest hole) is the most precise by far as I want this to fit pretty precisely to the pickups. For this cut I will be doing a lot of sanding for finish to make sure it’s very precise.
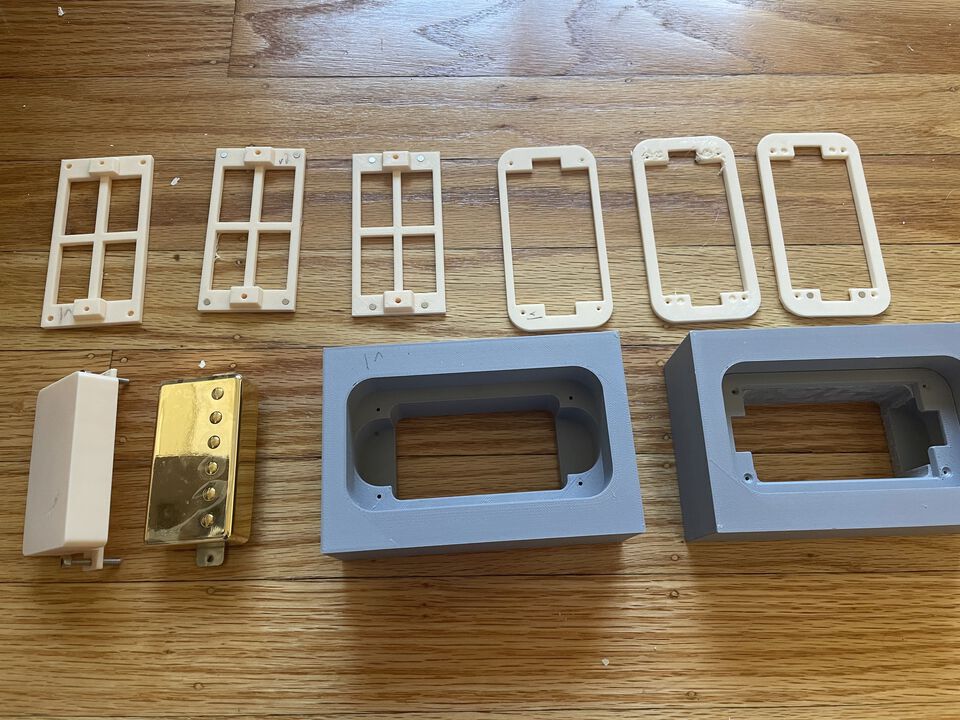
My favorite part of having a 3d printer is how fast I can prototype parts. For this part I designed and printed 5 iterations of the mechanism before I was satisfied. The biggest challenge here was figuring out how big I needed the holes to be, and finding the smallest size magnet that would work.
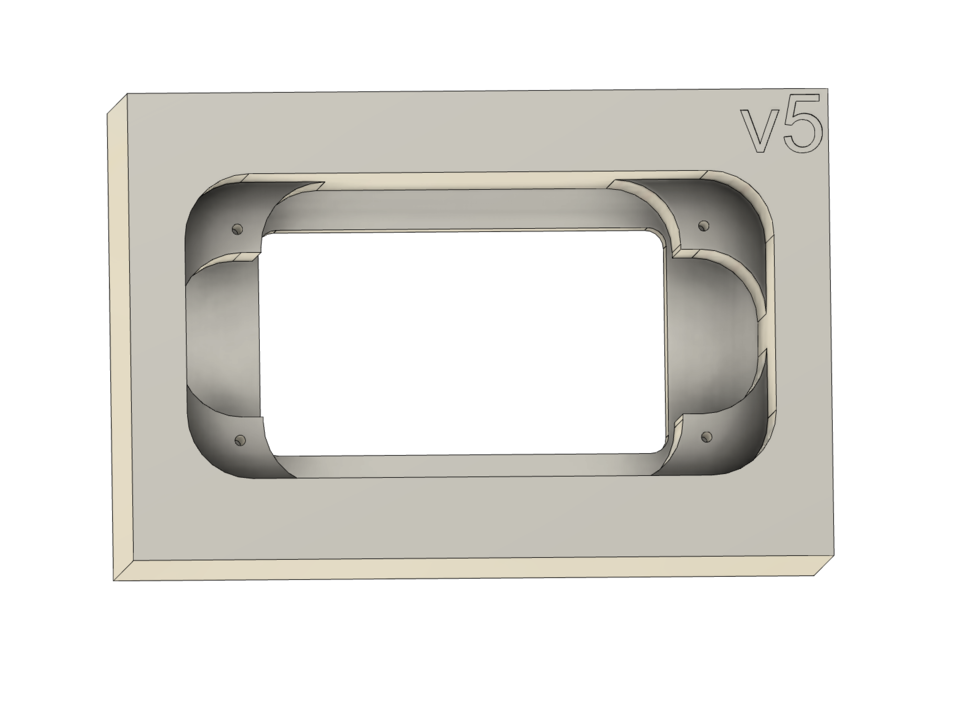
Once I figured out the design, the next challenge was figuring out how the hell I was going to router it into the wood. This is a technique I figured out on my own, I am surprised I don’t see more woodworkers online doing this. It was very easy to 3d print the exact templates I needed for this project, pictured below.
Using the above templates from left to right gives you a very precise cut of my design.
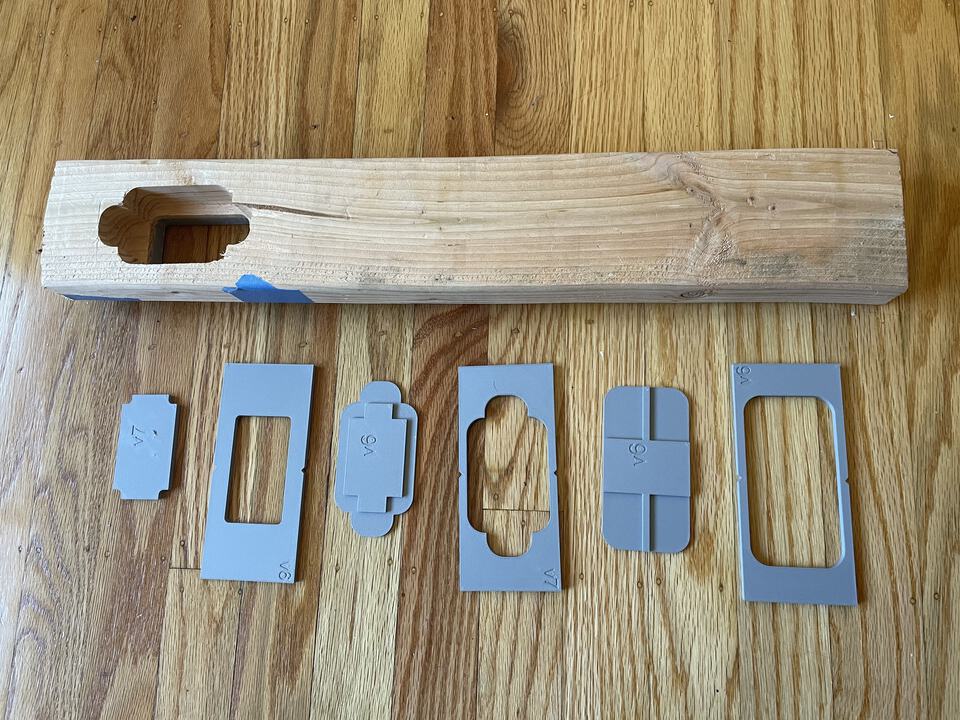
Naturally, I prototyped and tested this cut many many times before I was sure that it would work. The biggest challenge with this design is that the corner radius on the front cut is too small for my router. On the final cut it took quite a lot of hand filing to get it to size.
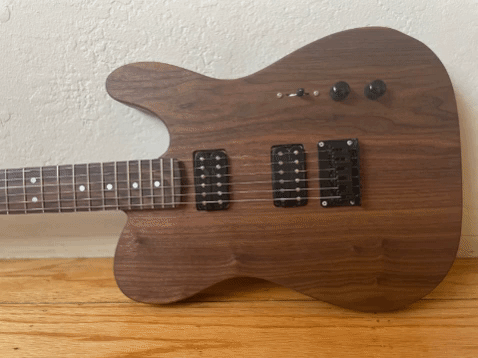
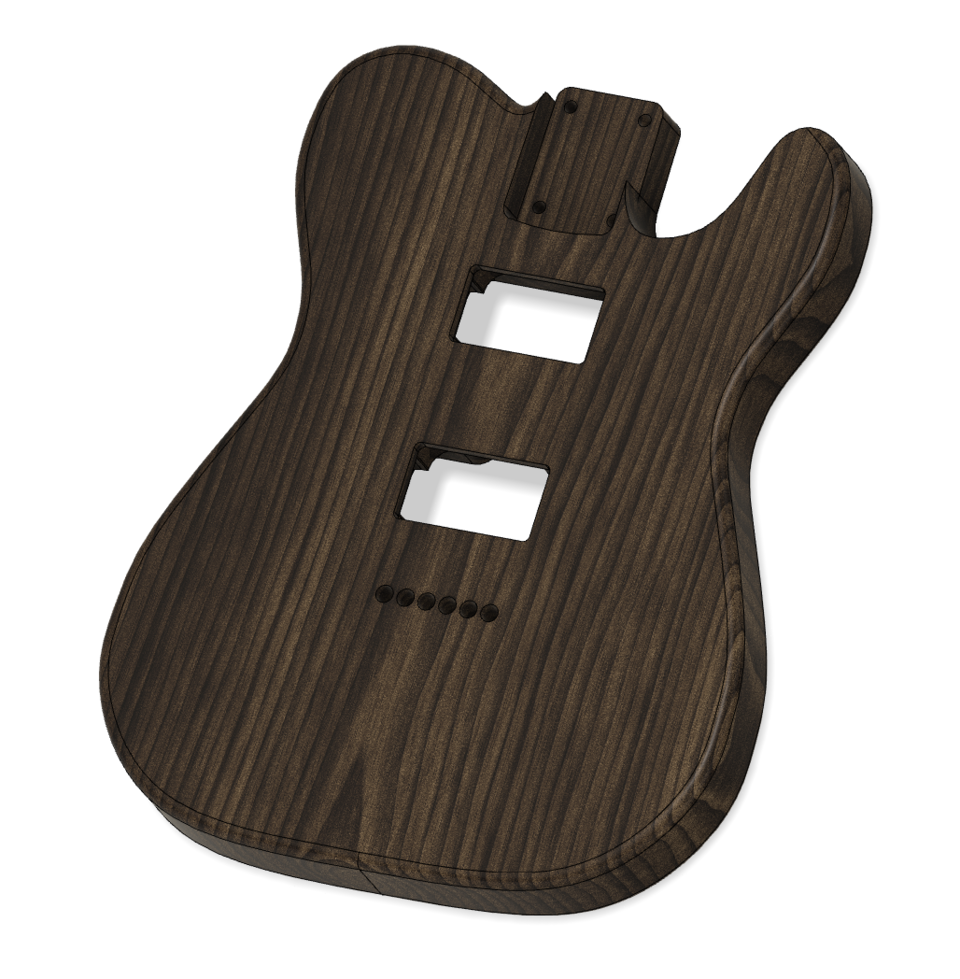
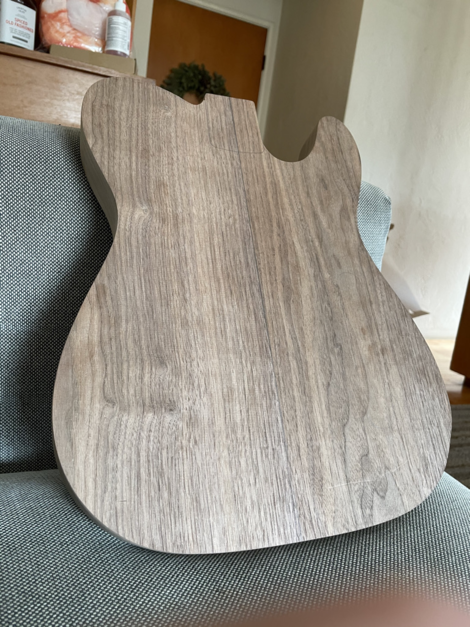
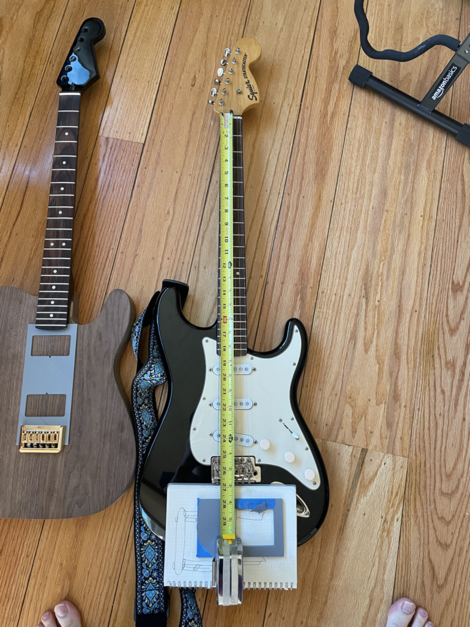
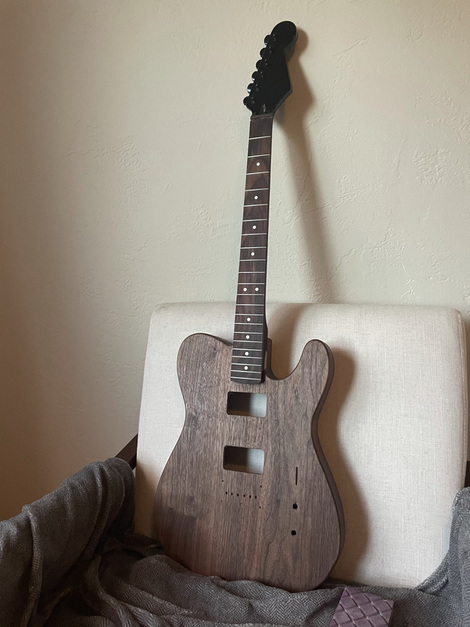
As this is my first guitar, I started with the easiest design to cut, the Telecaster (or T-Type if you are scared of trademarks). I bought a wooden router template off ebay, and whipped up a design in fusion-360 so I had measurements to guide my cuts. Here is the final design:
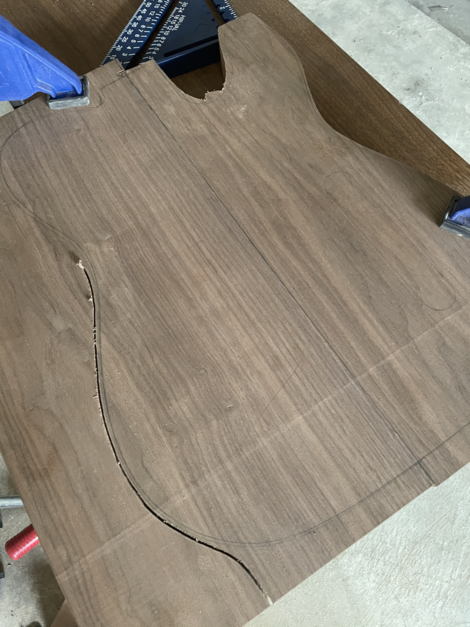
Definitely the hardest part of this project, but also the least interesting for a blog post. Instead of boring you with the details I’ll just show a bunch of photos of the process. I ended up relying pretty heavily on 3d printing templates in this build, as they were a great way to print precise dimensions for measurement.
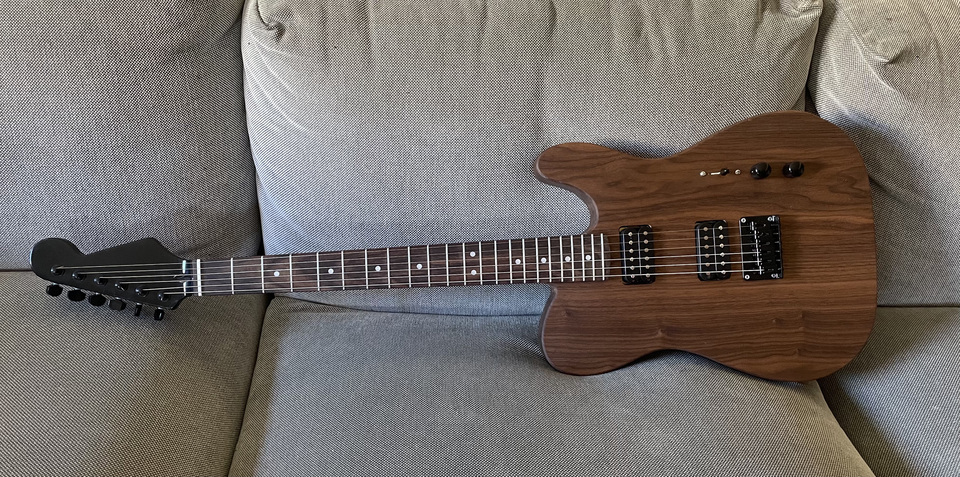
This project probably took me around 200 hours to complete, but was a huge joy to work on. I spend most of my day staring at a computer screen so it was great to build something with my hands for a change.
There are a few things I will do differently next time I build a guitar:
As with all my projects, if you are interested in any of my design files or want to chat about anything at all, feel free to reach out to me directly at mdl0394@gmail.com. If you want to hear about future projects subscribe to my mailing list or RSS feed.
If you liked this post, you can also check out some other things I made here: