Click anywhere to close
I’m pretty obsessed with controlling most of the electronics in my house from my phone. One of the last remaining devices was the thermostat. I don’t want a Nest because it doesn’t work with HomeKit, and I can’t use an EcoBee because I don’t have a neutral wire. So I resolved to build my own.
If you are building your own thermostat, or any hardware really, and want some help or just want to show it off, feel free to shoot me an email at mdl0394@gmail.com. Also I plan to continue to expand this project to have a screen and some buttons, if you want to hear about that signup to my email list and I’ll let you know when I do it.
I am considering turning this project into something people can buy. If you’d be interested in buying a hackable thermostat, register your interest here
This is part one of a multi-part series, you can find part 2 here
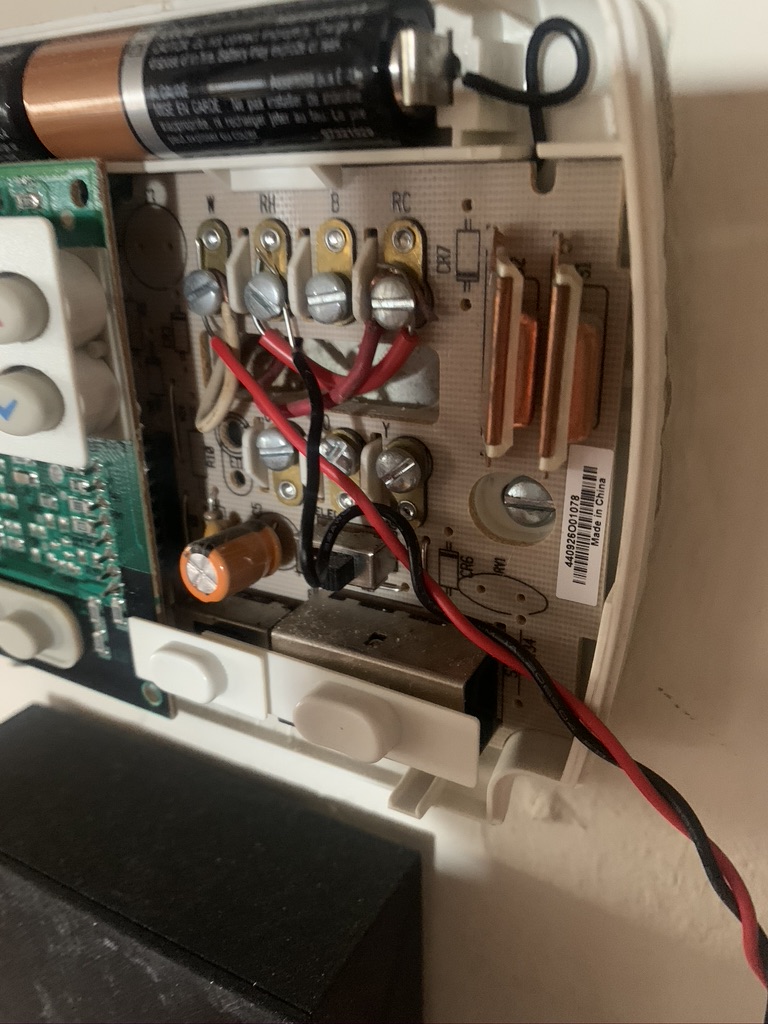
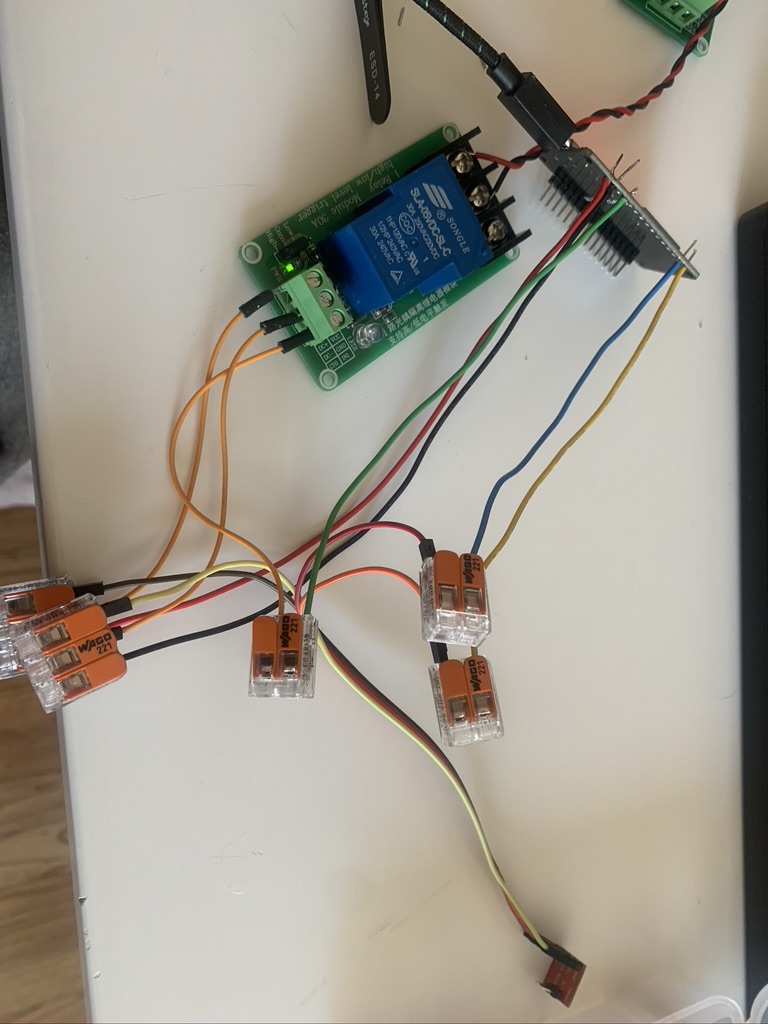
So I turns out my heater runs on a really simple control protocol. There are just two wires run from the heater to the current thermostat, when you connect them it turns on, and when you disconnect it turns off. The only unfortunate part of it is that the wires are 24vac, so to be safe I need to use a solid state relay for switching.
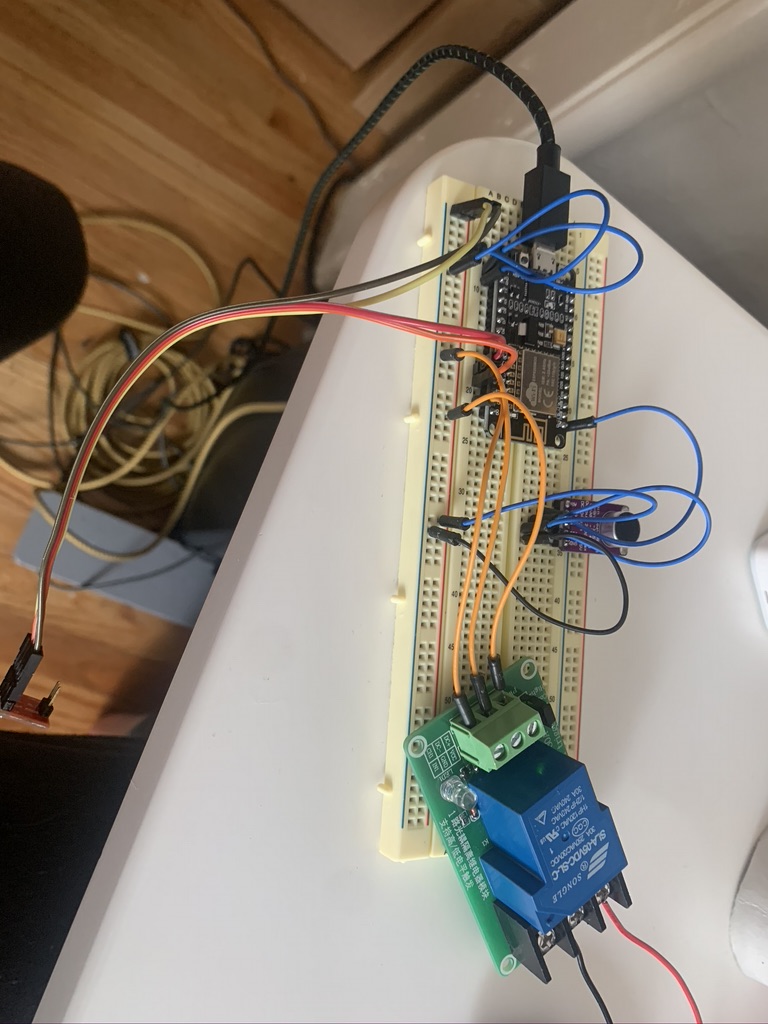
I am building this whole thing on an esp32, with a big overkill relay I got on amazon prime. I will link the exact parts below. The current thermometer is an old tmp102 sparkfun board I had lying around, but it’s off by around 6 degrees, so in v2 I will be replacing it with hopefully a more accurate one.
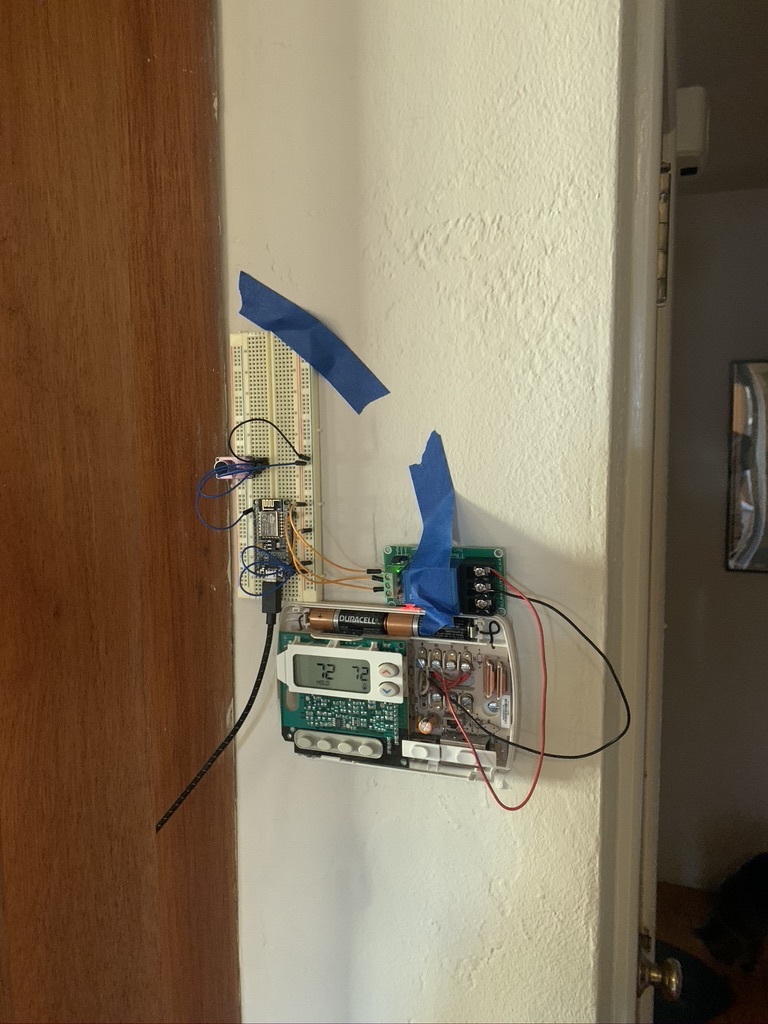
After wiring it all together, and taping it to my wall for a day or two, I was satisfied with the components, and wanted to get started on prettying it up a bit.
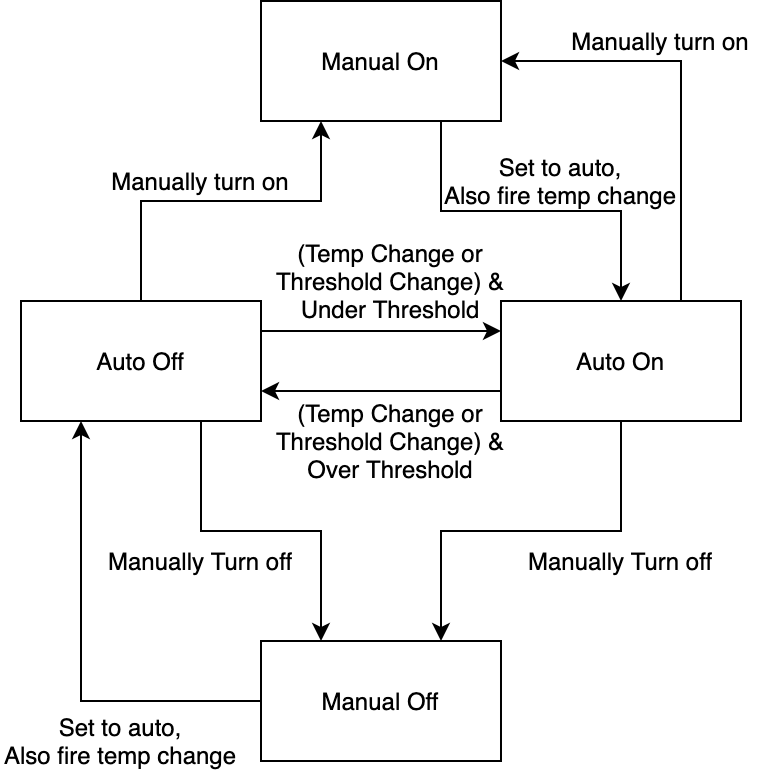
The thermostat control runs on a pretty simple state machine. I am a big fan of drawing things out ahead of time, so I drew this diagram for myself before coding. In C this is implemented as two enums (actions, states) and a bunch of switch case statements.
It was very important to me that the thermostat worked on homekit, thankfully there are already great homekit (hap) resources for the esp32. After some digging I decided on this homekit package, as it’s a clean port of the expressif homekit library to arduino. There are about 15 different homekit frameworks for arduino, so at some point I just had to choose one and start running.
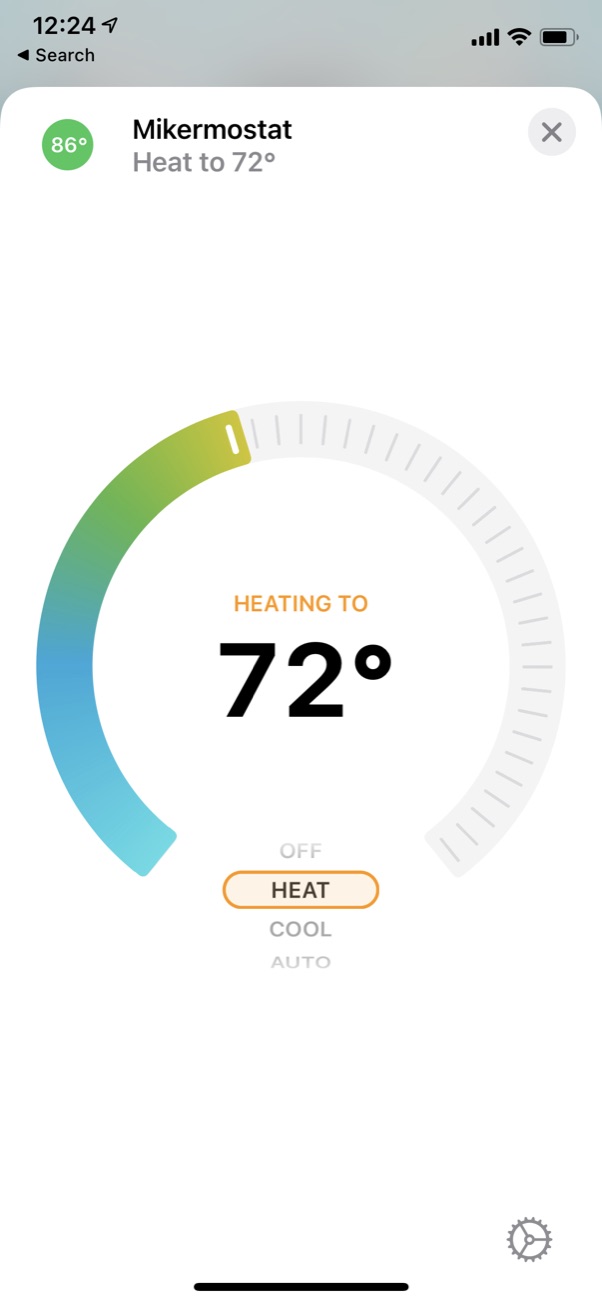
After a whole bunch of fucking around I managed to get my esp32 to show up as a thermostat from my phone.
A few gotcha’s that I encountered along the way: (some specific to this library, some specific to homekit)
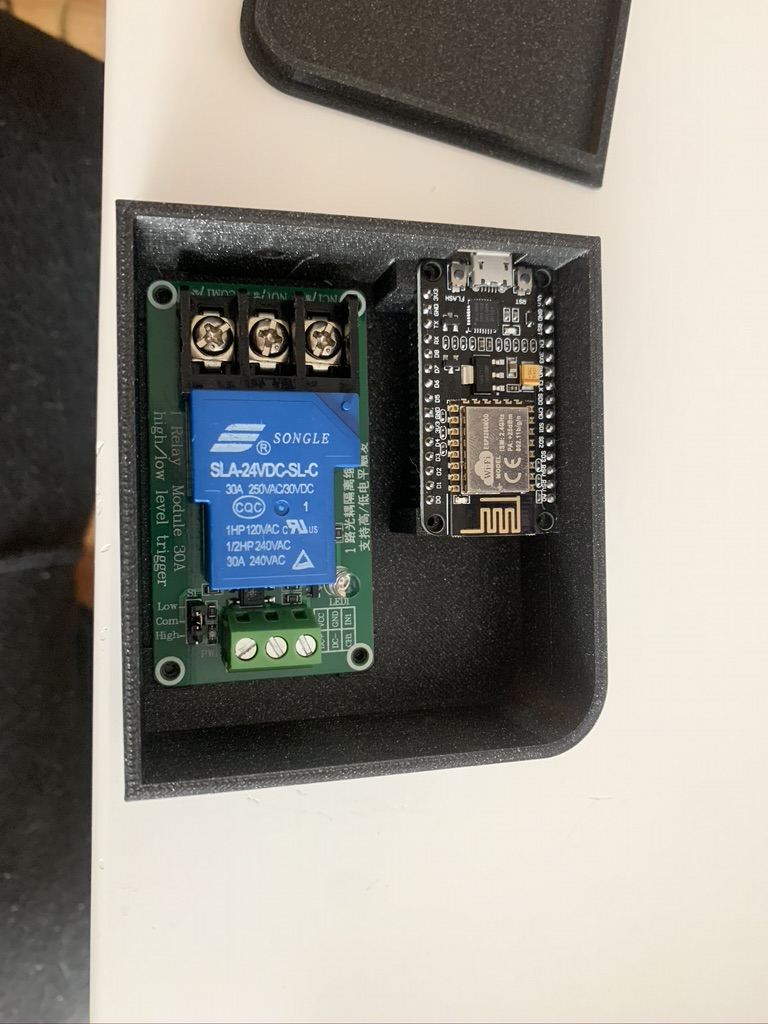
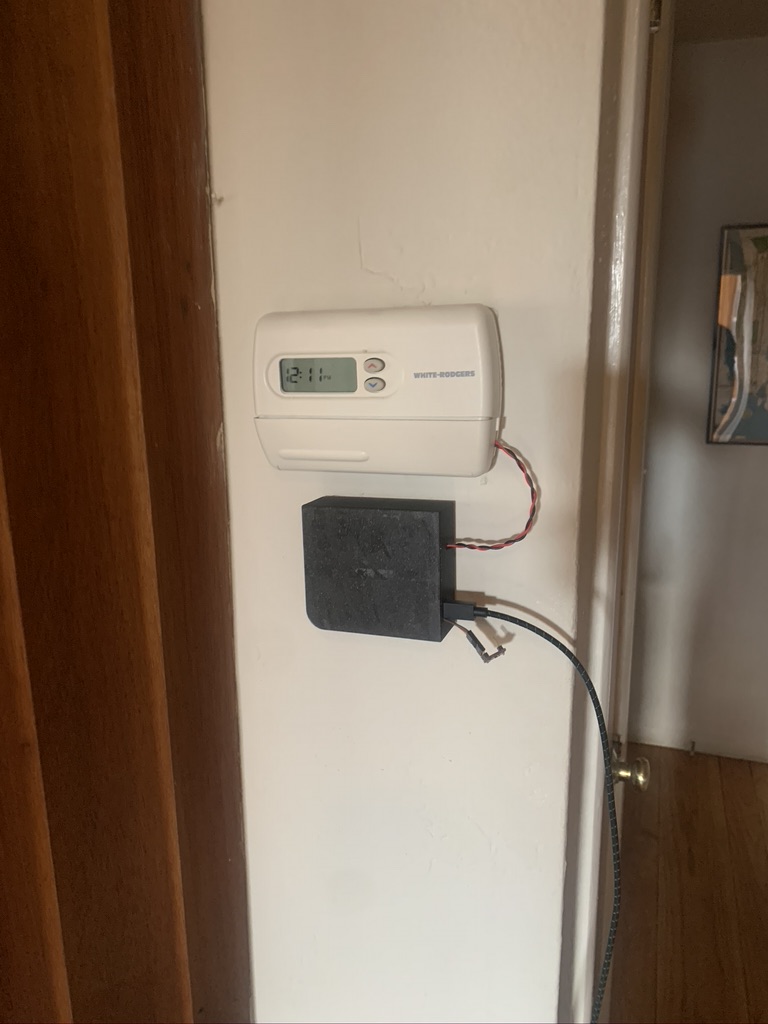
After getting the code into a place I liked, all that was left was to make it look less like a bomb strapped to my living room wall. I 3d printed an enclosure, and soldered the correct wires in the correct places. Unfortunately my board requires constant a 5V micro-usb power source, so as of right now I have it powered off of a huge battery pack. Maybe in vN (for very large values of N) I will go nest style with an internal LiPo and an AC-DC converter.
The v2 post is live here, where I added all the things listed in this section
I have already bought a few parts for a planned v2, so stay tuned. In v2 I will be adding:
I am considering turning this project into something people can buy. If you’d be interested in buying a hackable thermostat, register your interest https://docs.google.com/forms/d/e/1FAIpQLSePJdT7qP9IMAK_TZLCWFs1sodBei73pinnji0GxVe9dMl8Zg/viewform