Click anywhere to close
The v1 post did really well, thank you guys for reading about it. I had a few more days in vacation, and wasn’t quite satisfied with the v1, so I decided to make some more updates.
Like I said in the last post. I love talking to people about these sorts of projects. If you are building your own thermostat, or any hardware really, shoot me an email at mdl0394@gmail.com. I will also be in the HackerNews comments section of this post if you want to chat there.
I am considering taking the steps to make this into something that I can sell to you. If you’d be interested in buying a hackable thermostat, let me know in this form here.
My last post on this blog details the v1 thermostat, but I’ll throw a brief recap in here. The v1 was a thermostat in a black box built with an ESP32 and a relay I found on amazon. The basic goal was to allow me to control my heating system from my phone, even though I couldn’t buy an eecobee (or at the time I thought I couldn’t at least).
My main goal for v2 is to turn this into something I feel comfortable using every day. To get there I wanted to accomplish these tasks:
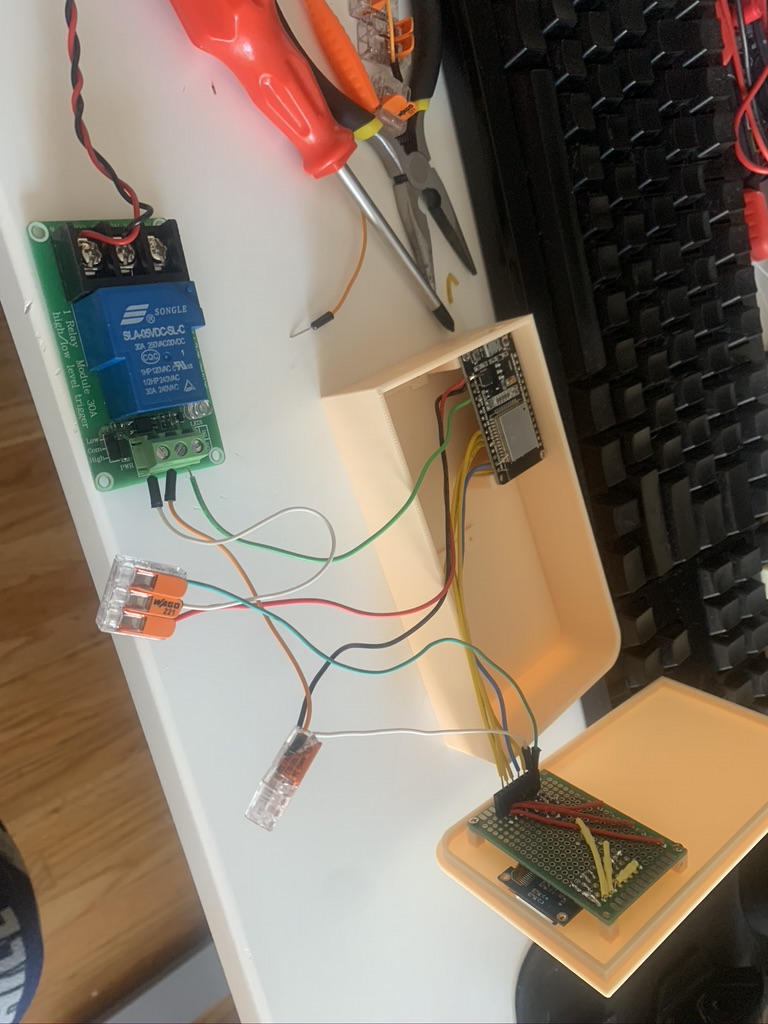
A few new components in this build, so naturally the first thing to do was to test them all out.

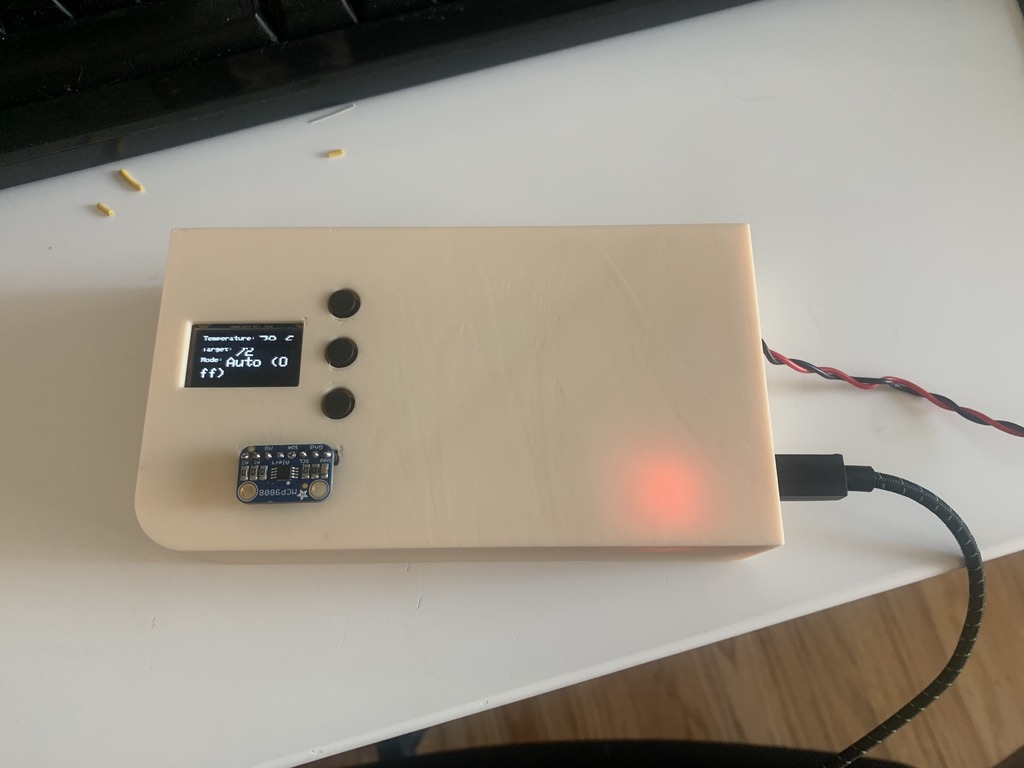
I intentionally bought an I2C display to make it easier to wire things together. The thermometer is i2c as well, so this reduces the number of wires that need to go from ESP → Project Board.
Thanks to the hilariously easy to use adafruit libraries both the thermometer and display were working in a matter of minutes. (Adafruit SSD1306 and Adafruit MCP9808). I would throw in some code for how I am controlling these devices, but it’s literally just the example projects with some stuff deleted out of the middle.
v2 is intended to be used for quite a while, so I wanted things secured pretty well on a project board, rather than having a nest (heh) of wires shoved into a box.
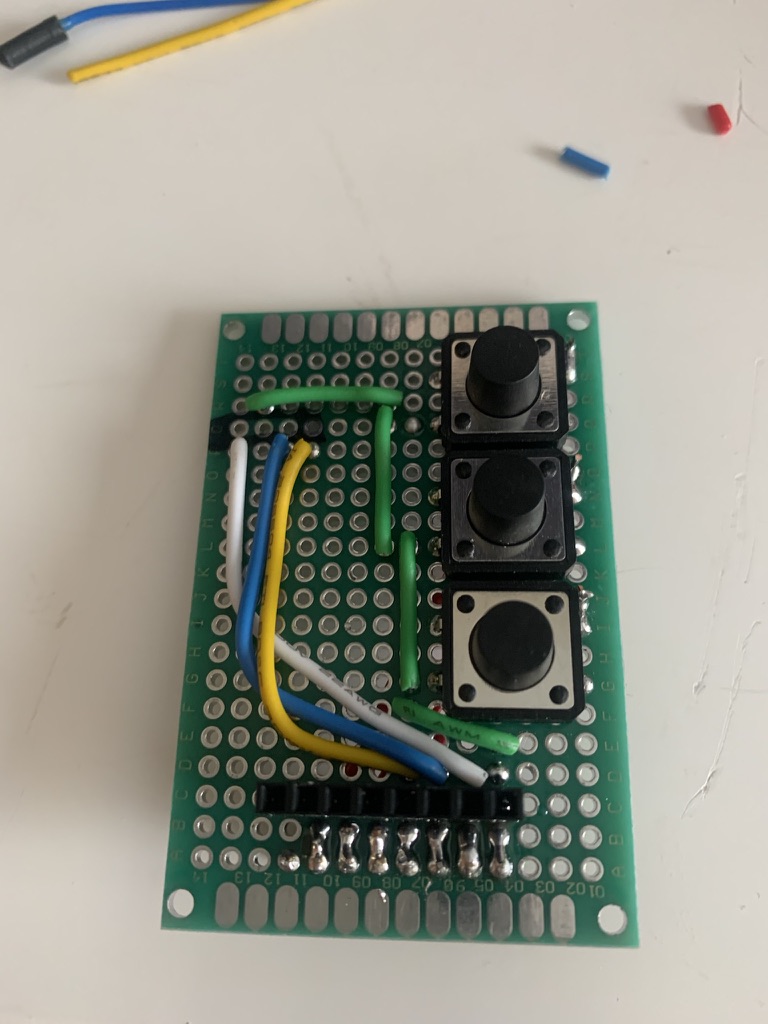
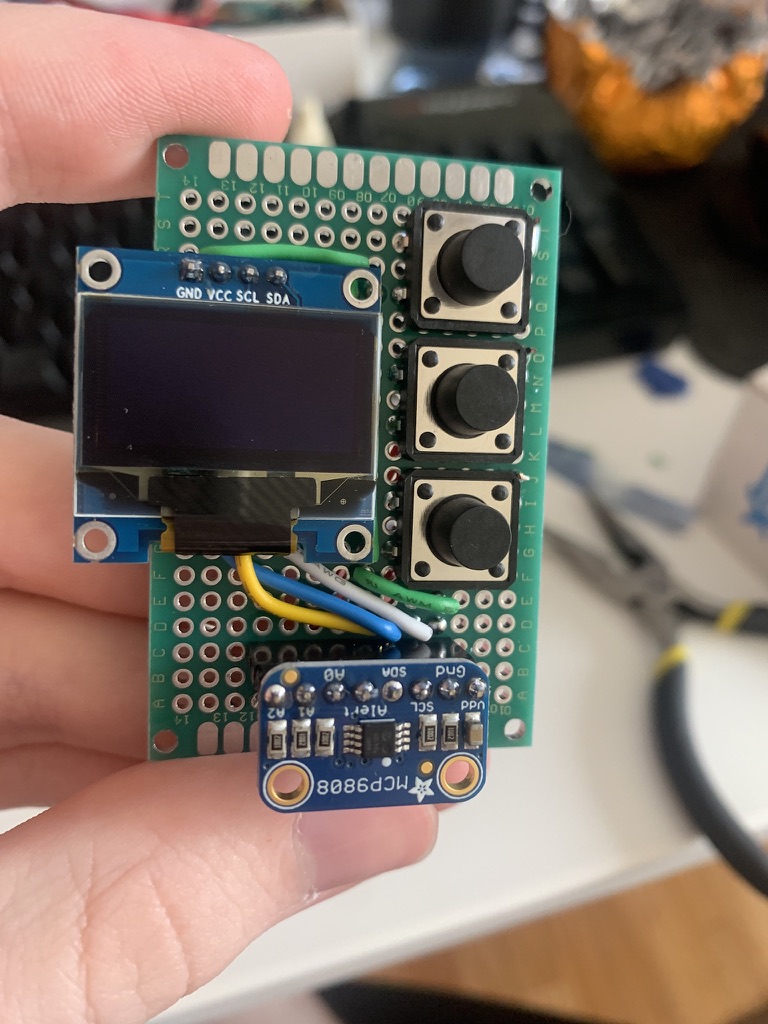
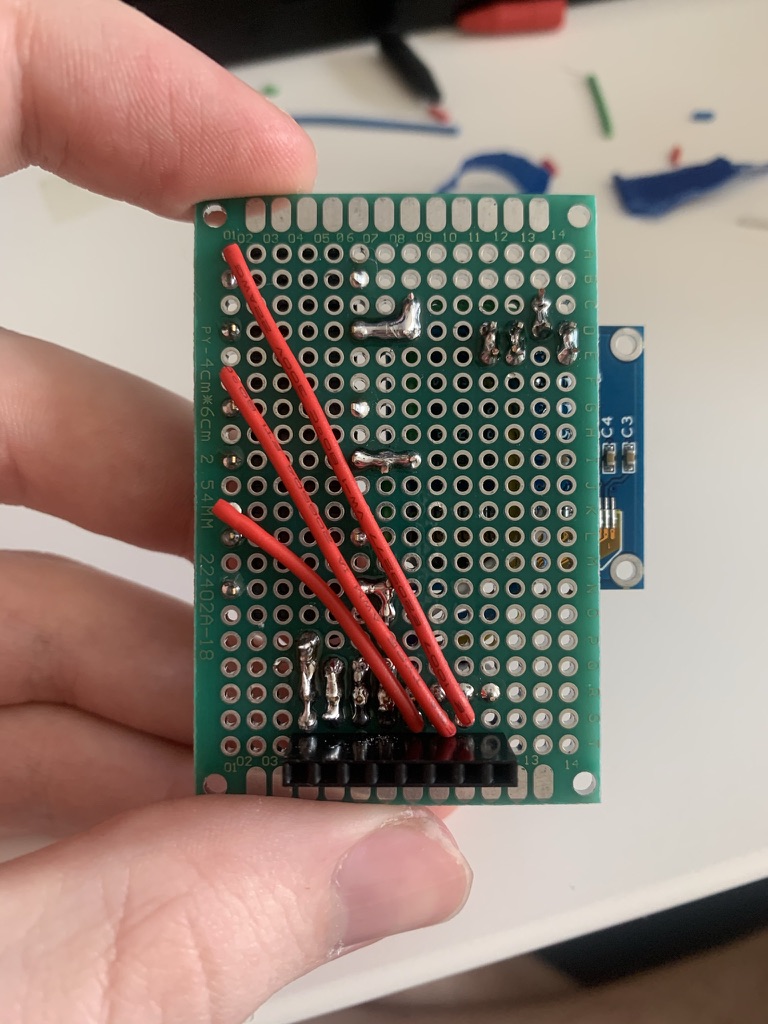
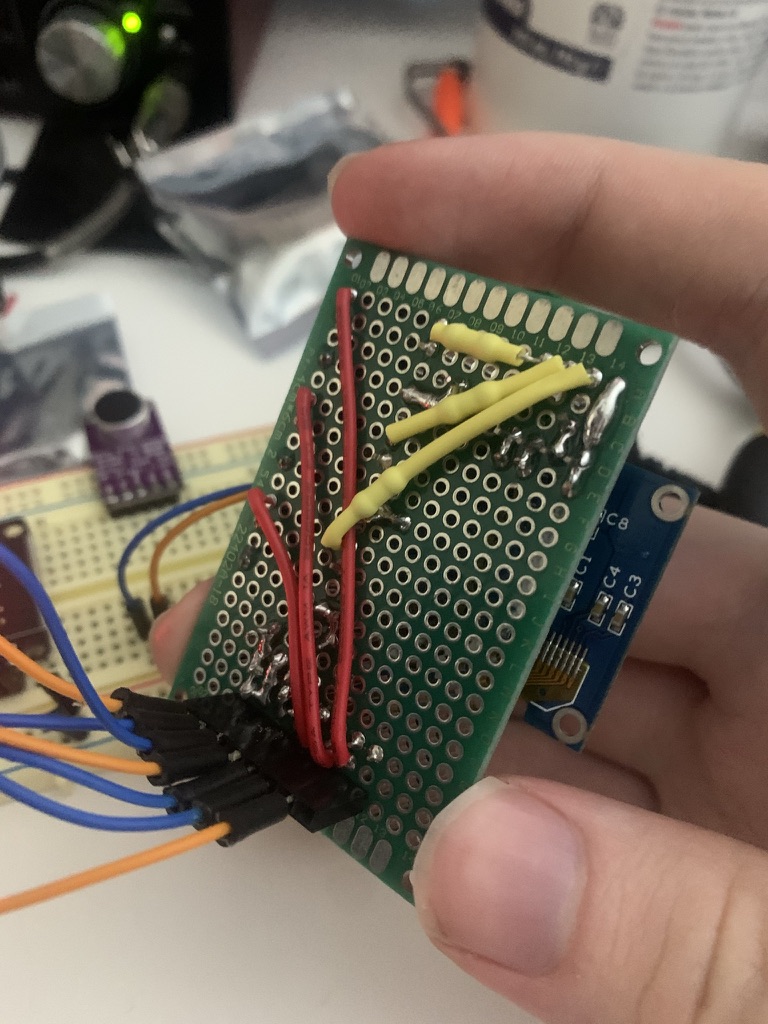
Basically went down without a hitch. I did forget to include pull down resistors for my button originally, but you can barely even tell they were added as an afterthought in the finished product (the yellow heatshrinked 10k resistors).
I am pretty satisfied with how the project board came out. Things lined up pretty well naturally, and I had enough space to include a debug header on the back for all of the connections to the ESP32. I plan to continue to make changes to this project, so I am trying to avoid more permanent soldering jobs to the ESP32, to save myself some de-soldering time down the line.
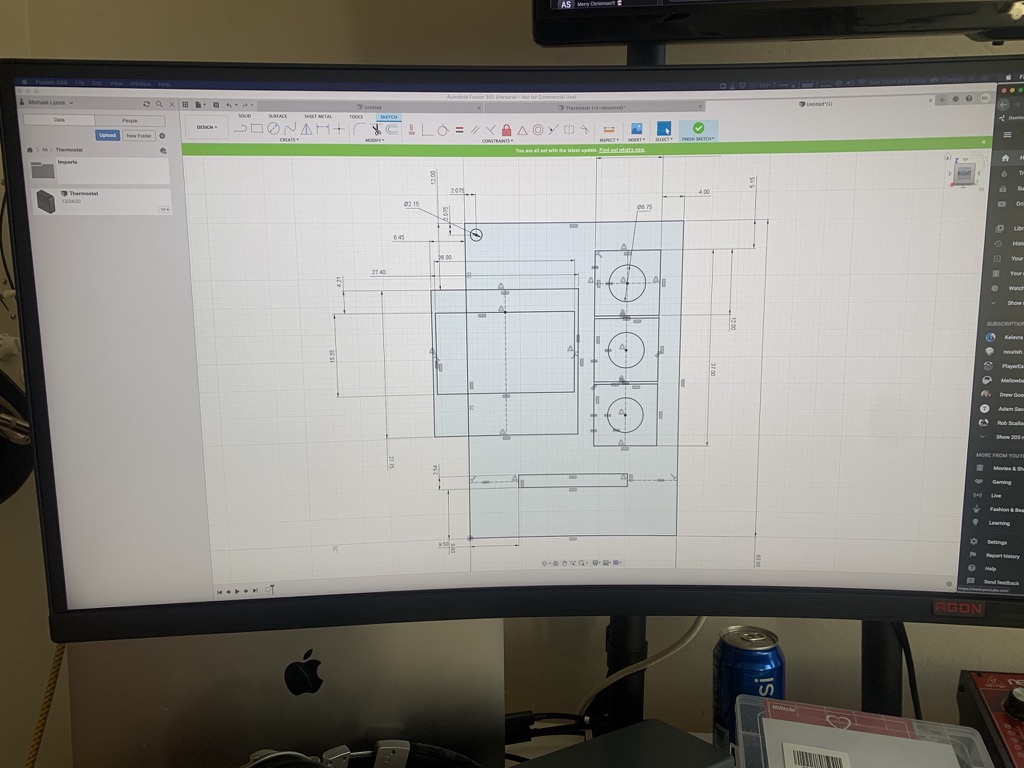
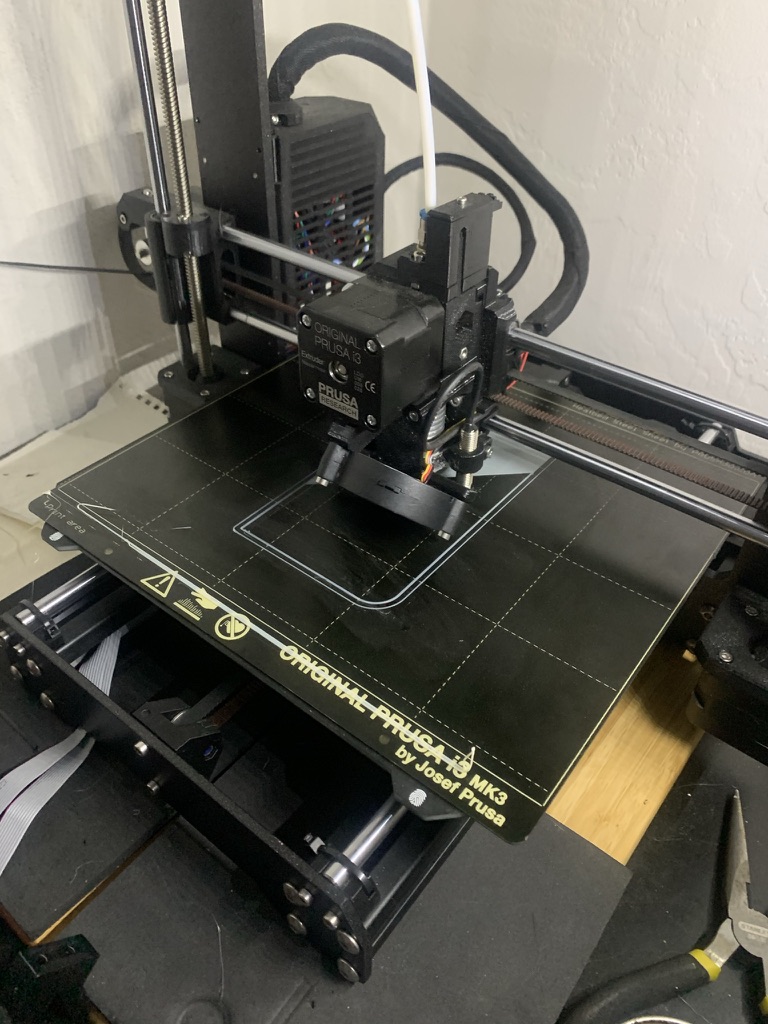
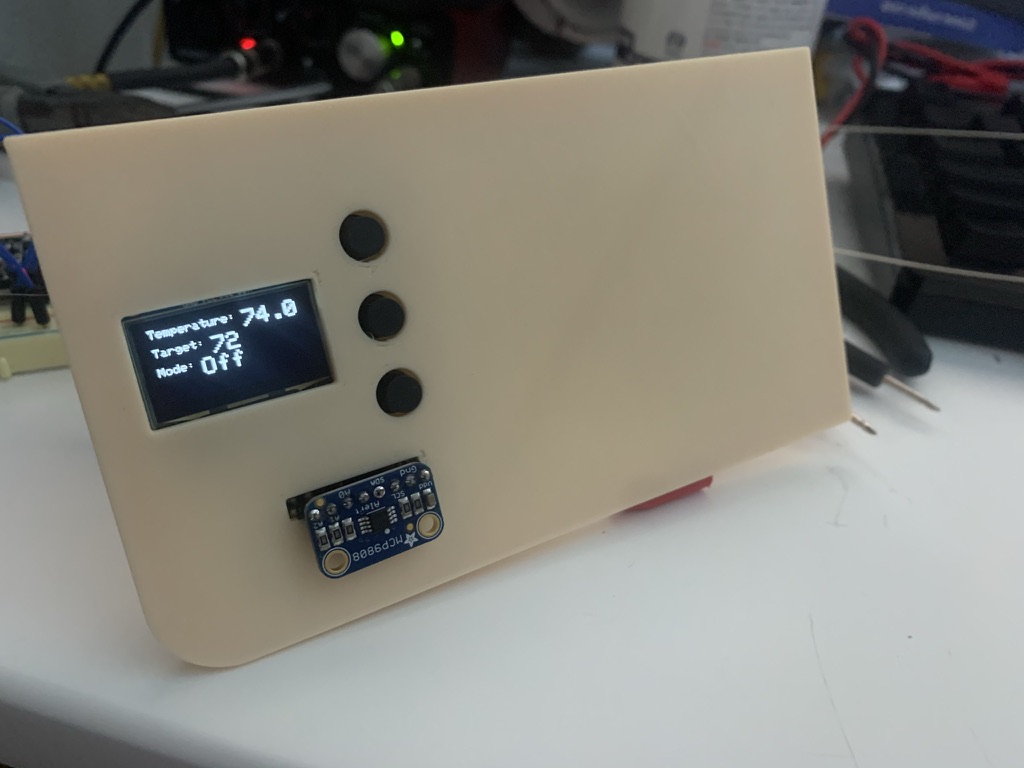
With the new components and display, the case needed to be expanded to comfortably fit everything in. After some quick modeling and an afternoon of 3d printing, the new case was born.
One of the new requirements for the v2 was that the heater will stay on for a minimum of 5 minutes, no exceptions, even if you manually turn it off it will still stay on for 5 minutes. In order to support this new mode, I have added the concept of “Waiting” to the state machine. Now instead of going to an off state, if it has been <5 minutes since the thermostat was turned on, the thermostat will go into waiting instead.
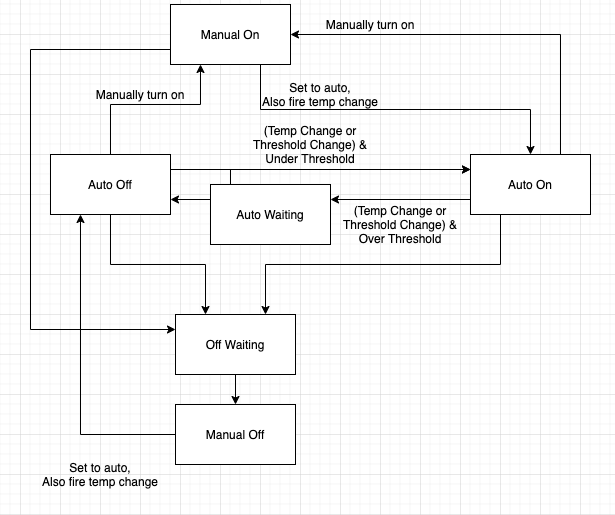
Some have argued that using a state machine for this problem is overcomplicating the issue. That’s pretty valid, this state machine is fairly complex, but I really like that the state machine makes it really easy to code and understand both the current state of the thermostat and the transitions of the thermostat. As I continue to complicate the main control logic (example: adding a cooling mode or adding different stages of heating) it will only get more complicated, so I prioritized a more scalable solution over a simple solution.
Other than that the rest of the updates were pretty straight forward. The Adafruit display library made it as easy as printf to draw the current status onto the display, so there’s nothing really to phone home about there. And the buttons just fire actions that were already implemented for the homekit control system.
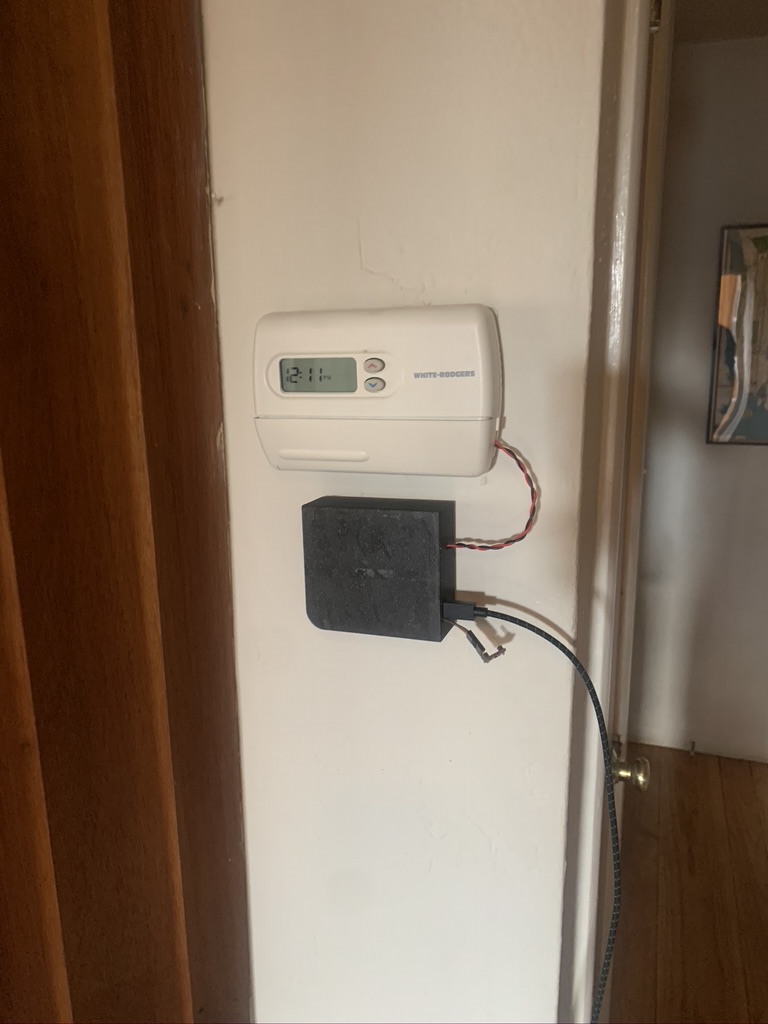
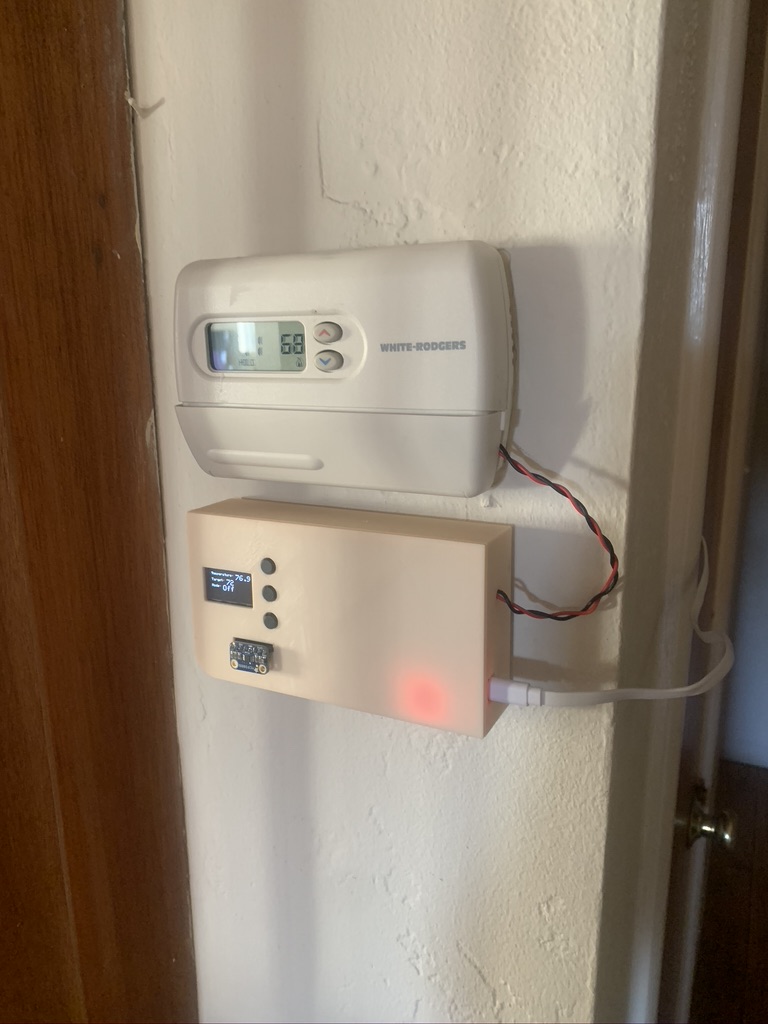
The only thing left to do was install it. I am honestly a bit disappointed that the LED shines through the plastic, but at least that makes it easy to see the current state of the relay. It’s now almost the same size as old thermostat, in future revisions the relay will shrink to a much smaller switching relay, so hopefully the size will shrink closer to that of an eecobee or nest.
I am pretty strongly considering turning this thing into something people can buy. If you’d be interested in buying an open sourced hackable home thermostat, let me know in this form (or reach out to my email directly).
v3 improvements already planned:
Asside from the parts used in v1, here are the new things used: